Click here to Download Barcode Maker Tool

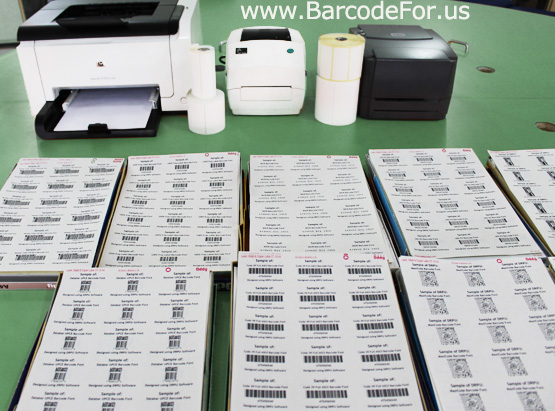
Nowadays barcode labels are used in different application areas like publisher, shipping, healthcare, inventory, warehousing, library, distribution and banking and many more to automate stock business management. Barcodes easily stores all kinds of information like manufacturing/expiry date, cost and many more. You can easily design barcodes using advanced batch processing series in random, constant and sequential series option. Today every company needs barcode stickers of different patterns and shapes so DRPU barcode label maker software is the right choice to perform this task in an automated manner.
Step by step procedure for setting bars height, density and margin between barcode labels:
Step 1:
DRPU Barcode Designer Software provides two panels to create barcode labels; barcode settings and barcode designing view, you can easily design barcodes using various faction of barcode software as drawing tools, shapes etc.
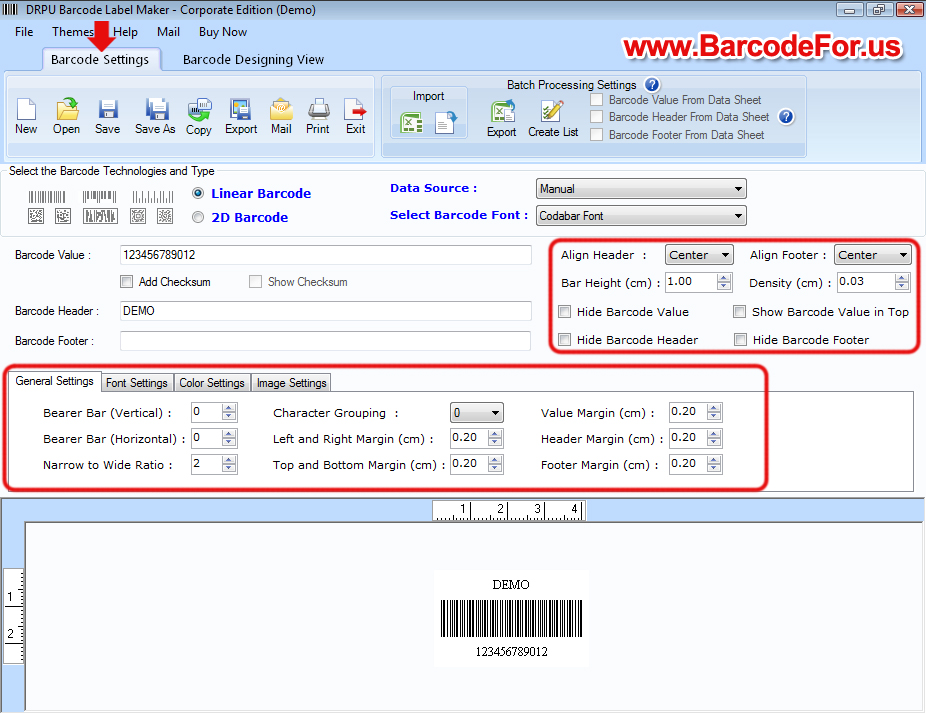
Step 2:
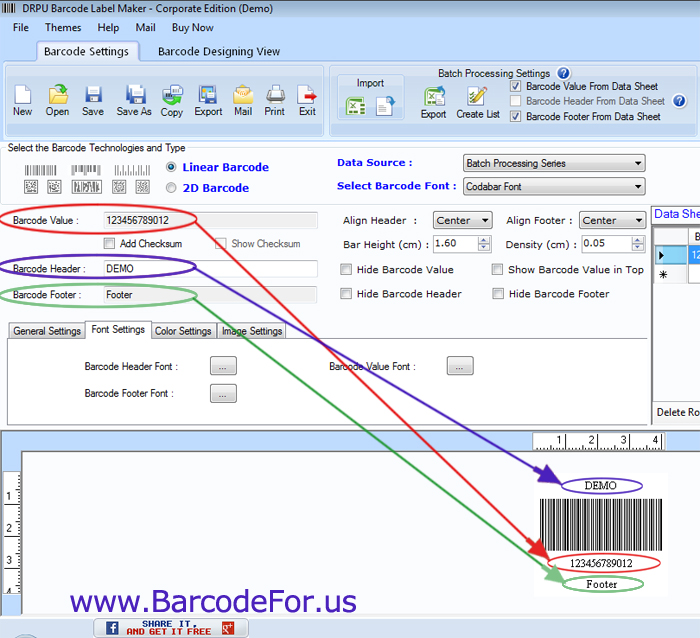
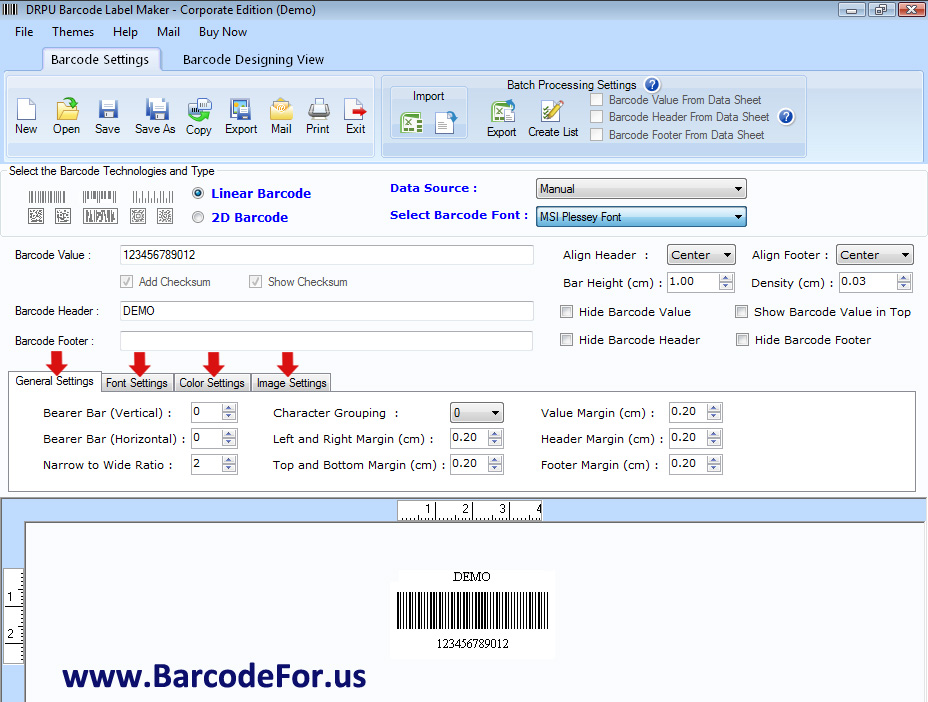
For making barcodes go to barcode settings, select type and font of barcode according to your business label needs. Enter value, header and footer adjust bar height and density of barcode.
DRPU Barcode Designer Software provides two panels to create barcode labels; barcode settings and barcode designing view, you can easily design barcodes using various faction of barcode software as drawing tools, shapes etc.
Step 2:
For making barcodes go to barcode settings, select type and font of barcode according to your business label needs. Enter value, header and footer adjust bar height and density of barcode.
Step 3:
To set your barcode, go to general setting, font, color, images according to your business label requirement. In general setting, set value margin, header and footer etc. In font setting set barcode header and footer font. In color setting set barcode color, background, header, footer and value color. In image setting set DPI and orientation of barcode.
To set your barcode, go to general setting, font, color, images according to your business label requirement. In general setting, set value margin, header and footer etc. In font setting set barcode header and footer font. In color setting set barcode color, background, header, footer and value color. In image setting set DPI and orientation of barcode.
Step 4:
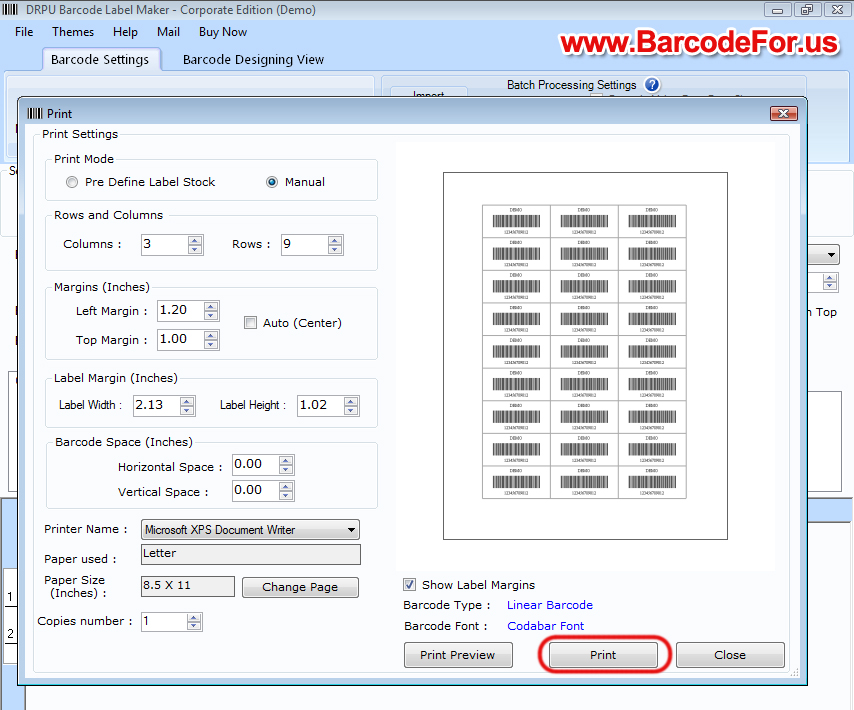
Go to print option set, select print mode, columns, rows, set margins, and space according to your roll or sheets.
Go to print option set, select print mode, columns, rows, set margins, and space according to your roll or sheets.
Step 5:
If you want to reset of your barcode height, density or margin close on close and set align header, footer, and general setting etc according to your product label needs and click on print option.
If you want to reset of your barcode height, density or margin close on close and set align header, footer, and general setting etc according to your product label needs and click on print option.
Step 6:
After set margin of barcode margin, height etc and give print command on software. Print your barcode according to your printer as laser or thermal printer. Now your barcodes are ready to use.
After set margin of barcode margin, height etc and give print command on software. Print your barcode according to your printer as laser or thermal printer. Now your barcodes are ready to use.
Click here to Download Barcode Designer Software

For More Details and query Contact me:
Shivangi Raj
Website: www.BarcodeFor.us
Email: [email protected]
Shivangi Raj
Website: www.BarcodeFor.us
Email: [email protected]

 RSS Feed